A good sound system can massively increase driving pleasure, but the factory-fitted speakers in many vehicles often leave a lot to be desired. Flat sound, tinny bass and a lack of dynamics are just some of the problems.
🎯 The solution? Install new speakers, preferably with professional door insulation. In this article, I’ll show you step by step how to prepare your car doors, replace speakers and get the maximum sound quality with insulation material.
🧰 What you need – tools & materials
Before we get started, here’s a checklist 📝:
🔧 Tools:
- *Plastic lever / trim removal tools
- *Cross and Torx screwdrivers
- *Cordless screwdriver or drill with 6 mm metal drill bit and circular drill bit if necessary
- *Cable cutter, *wire stripper, *crimping pliers
- *if necessary soldering iron
🛠️ Materials:
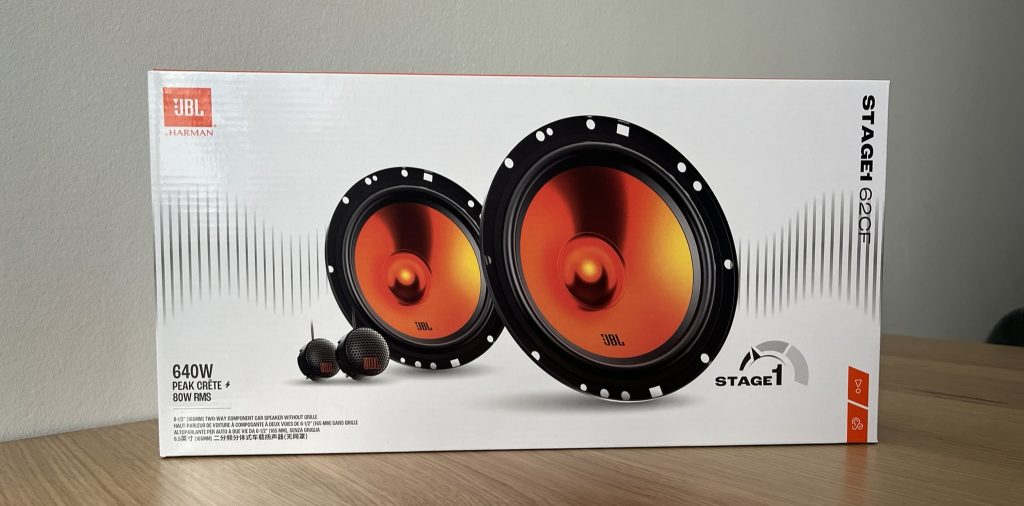
- *New speakers (e.g. JBL Stage 1, Pioneer, Hertz …)
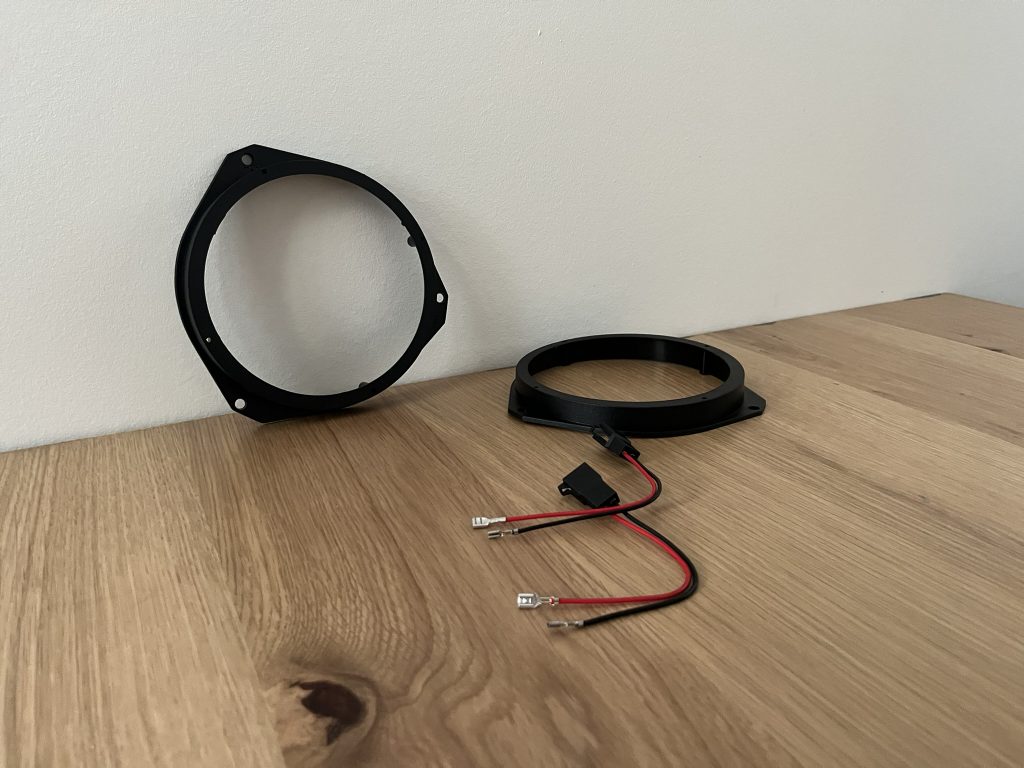
- *Loudspeaker adapter rings (depending on model, in this case for Fiat Tipo)
- *Cable adapter or speaker cable
- *Alubutyl for insulating the metal sheets
- *Foam / insulating fleece for the door trim
- *Cable lugs or soldering accessories
- Cleaning cloths & *brake cleaner
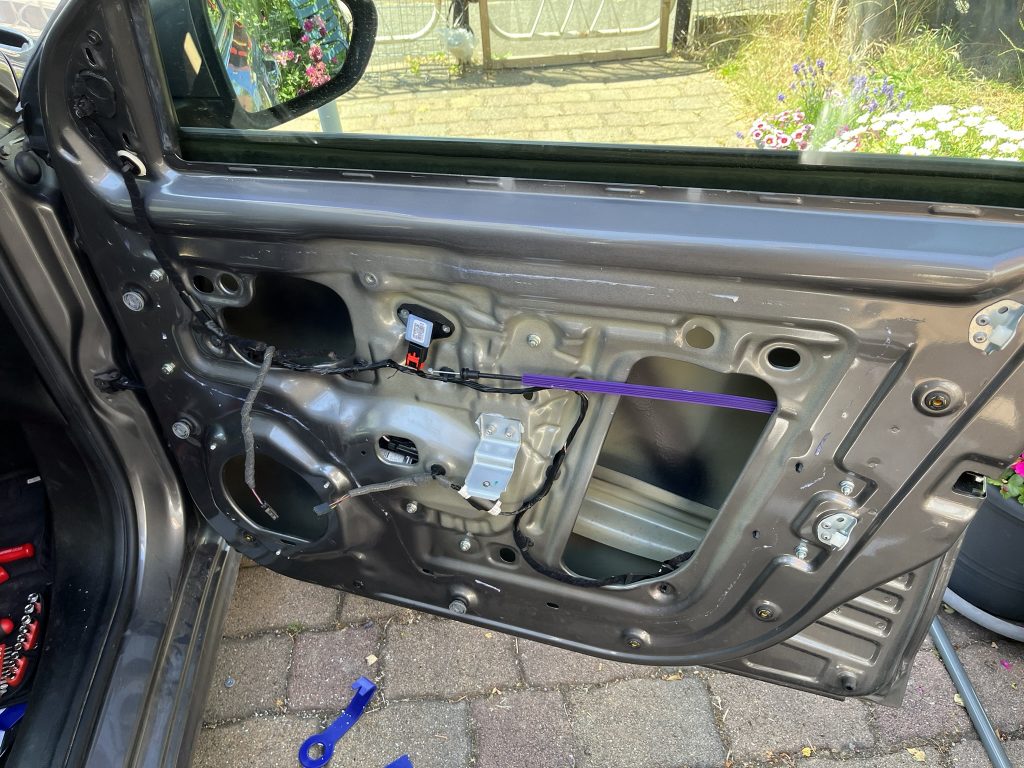
🔍 Step 1: Remove the door trim
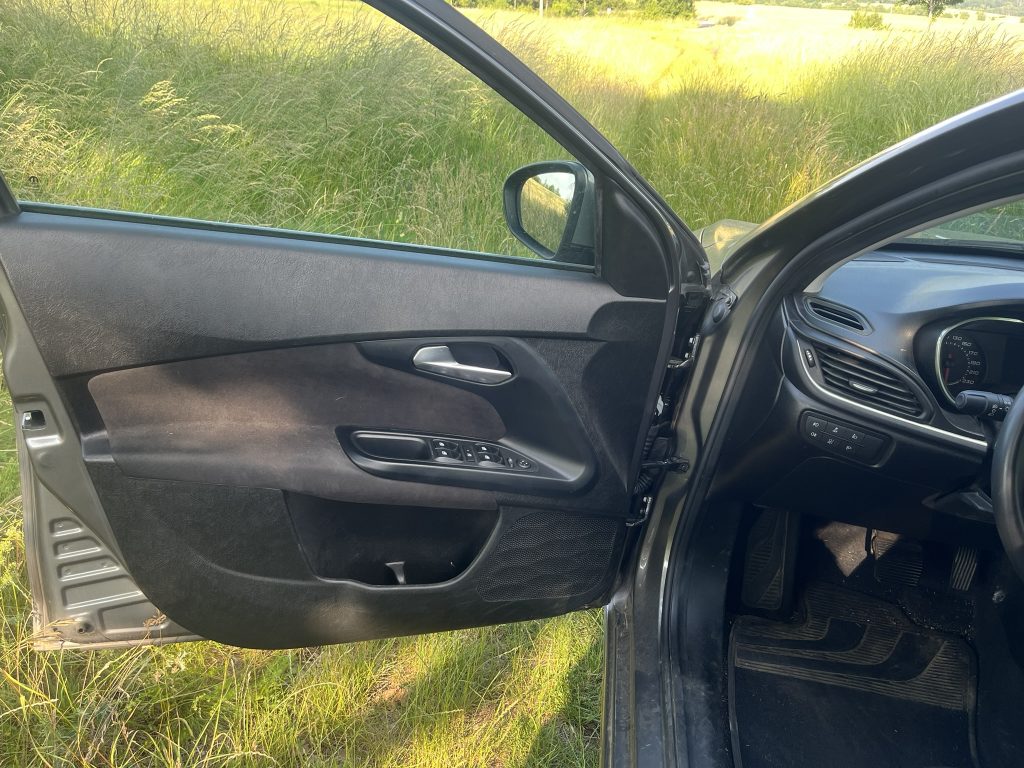
The first step is to carefully remove the door trim in order to access the loudspeakers and the inner workings of the door. This is how you proceed:
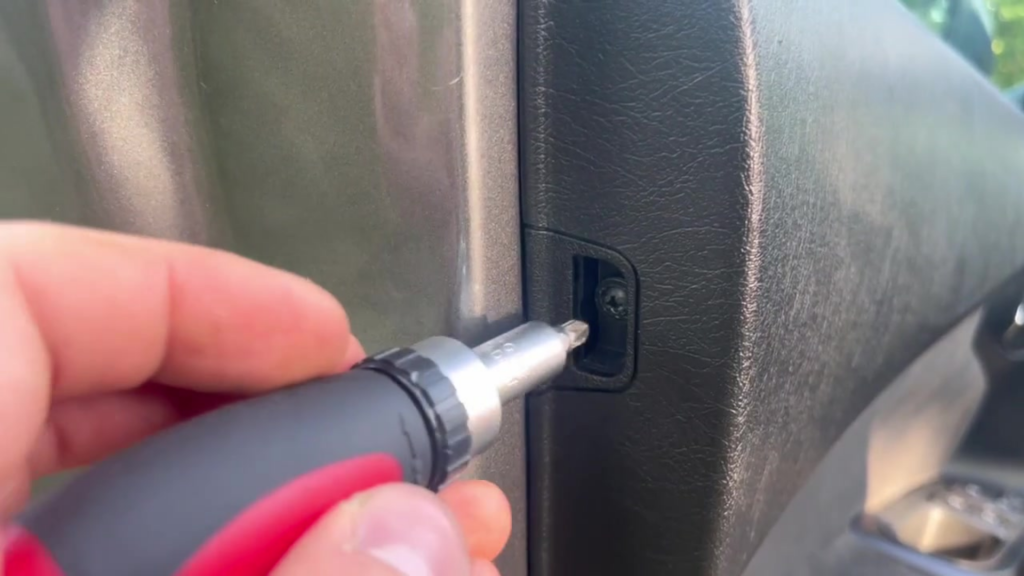
📍 Loosen the panel screws
Depending on the vehicle model, the screws are often well hidden – search here:
- behind small cover caps in the door handle
- under armrests
- in the area of the door pocket
Store the screws! (e.g. in a magnetic bowl 🧲)
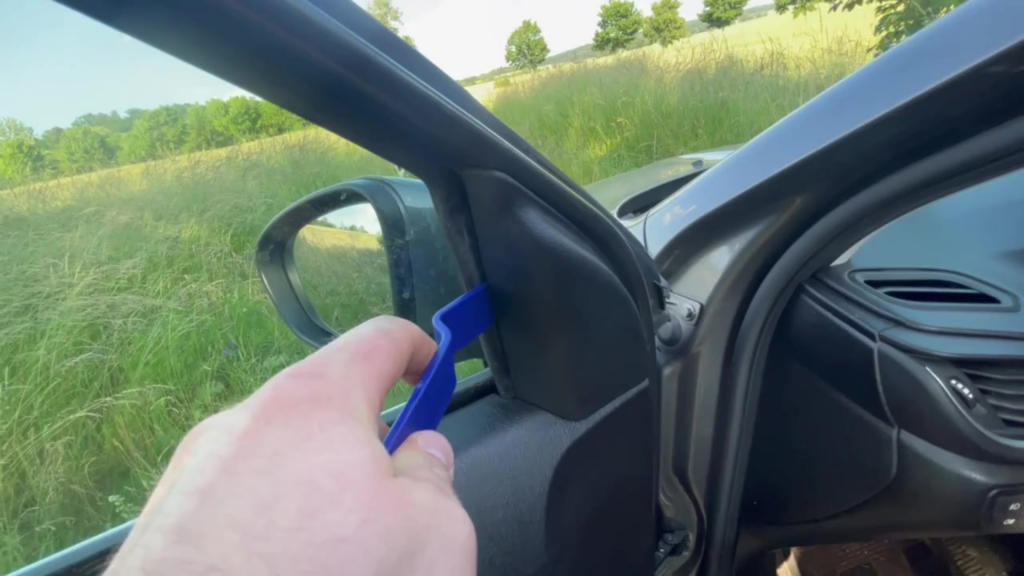
🪛 Carefully remove the cladding
- Use a plastic lever to work around the door trim.
- Loosen clips with feeling – too much force can break off plastic lugs.
🔌 Disconnect plug
- Remove the power windows, loudspeaker connection and ambient lighting if necessary.
- Now the door is free and you have full access to the interior parts.

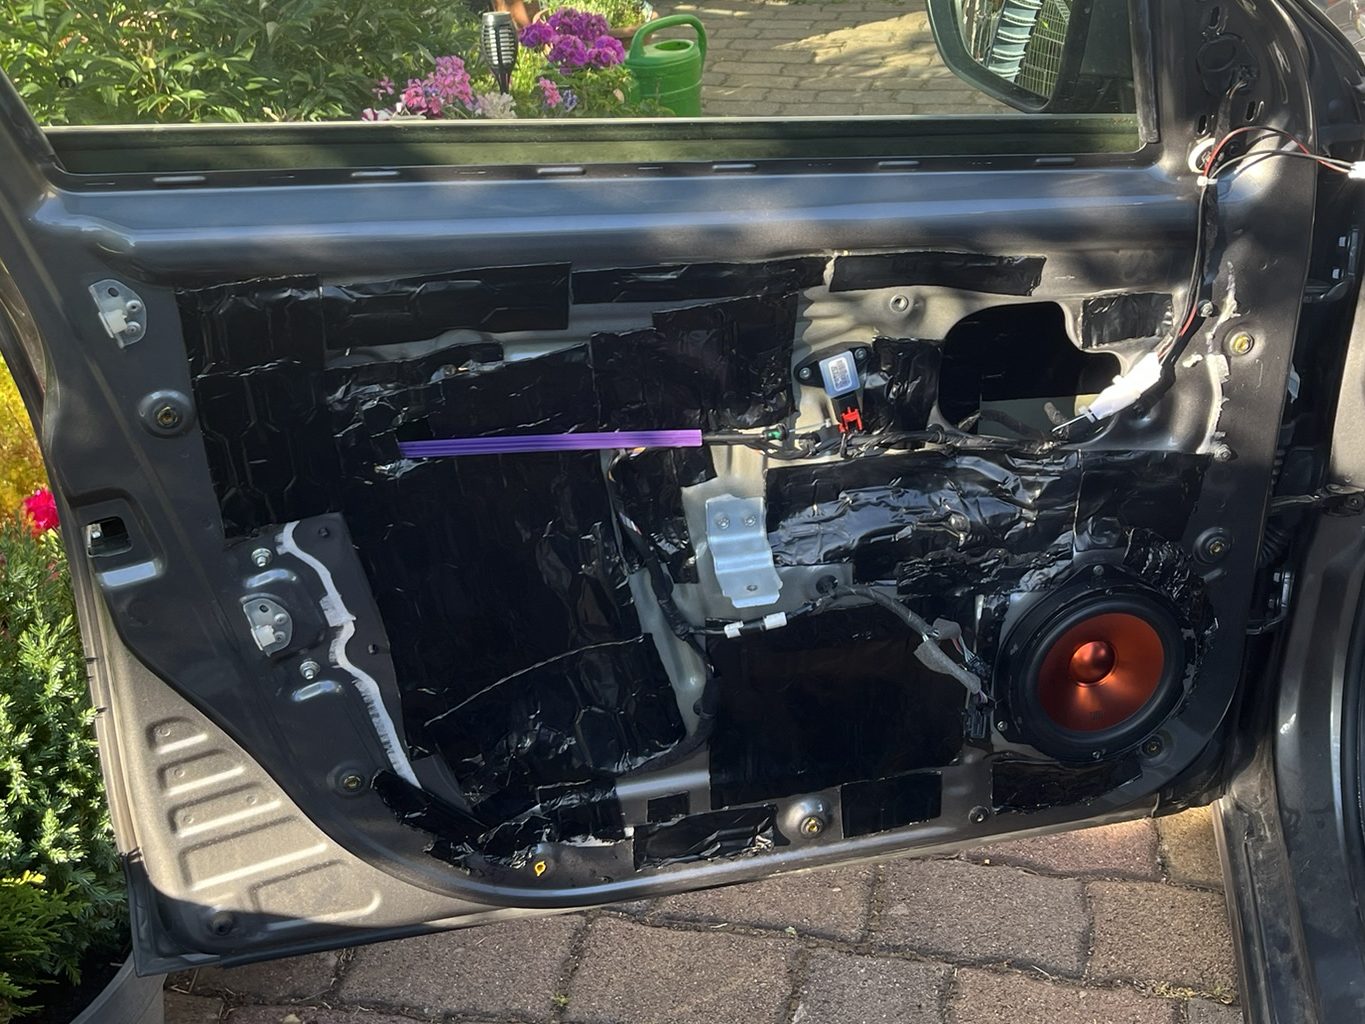
🧹 Step 2: Remove the factory speakers and remove the factory insulation
Now it’s time to get down to business! The old insulation and the old speakers have to go.

🛠️ Detach loudspeaker
- They are usually riveted or screwed together.
- Carefully drill out the rivets with a 6 mm drill bit (pay attention to cables and mechanics).
- Simply unscrew screwed models.
🔌 Remove plug
- Disconnect or cut the original plug if you are using new cables.
- If you use adapters, you don’t have to solder.
✅ Clean surface
- After removal: Dust off and degrease metal surfaces (brake cleaner).
- If necessary: Apply rust protection to drill holes.
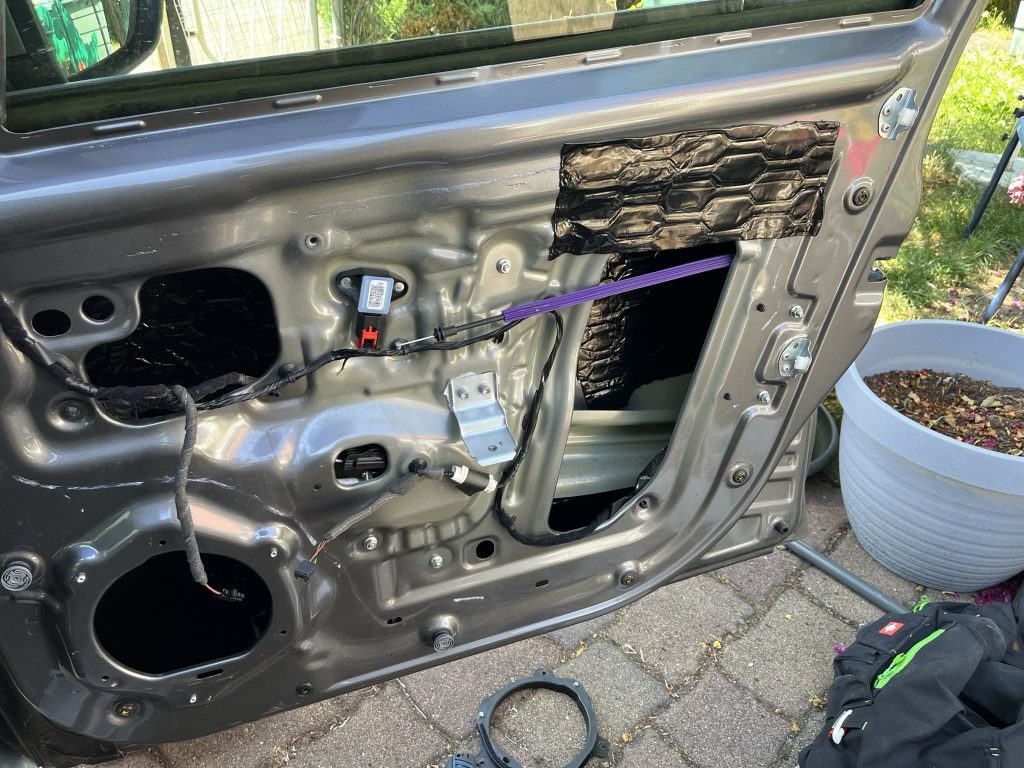
🔇 Step 3: Insulating the door panel – the game changer for better sound
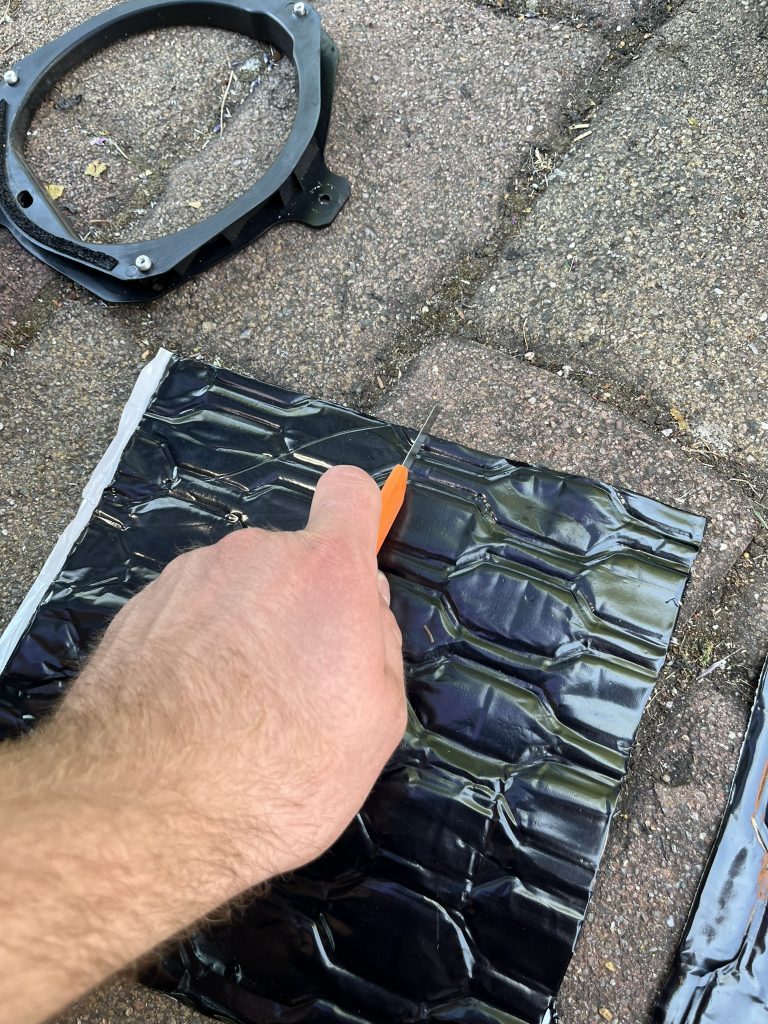
Good insulation often makes more difference than expensive speakers alone. It ensures:
- Less vibrations
- richer basses
- More “calm” in the sound image
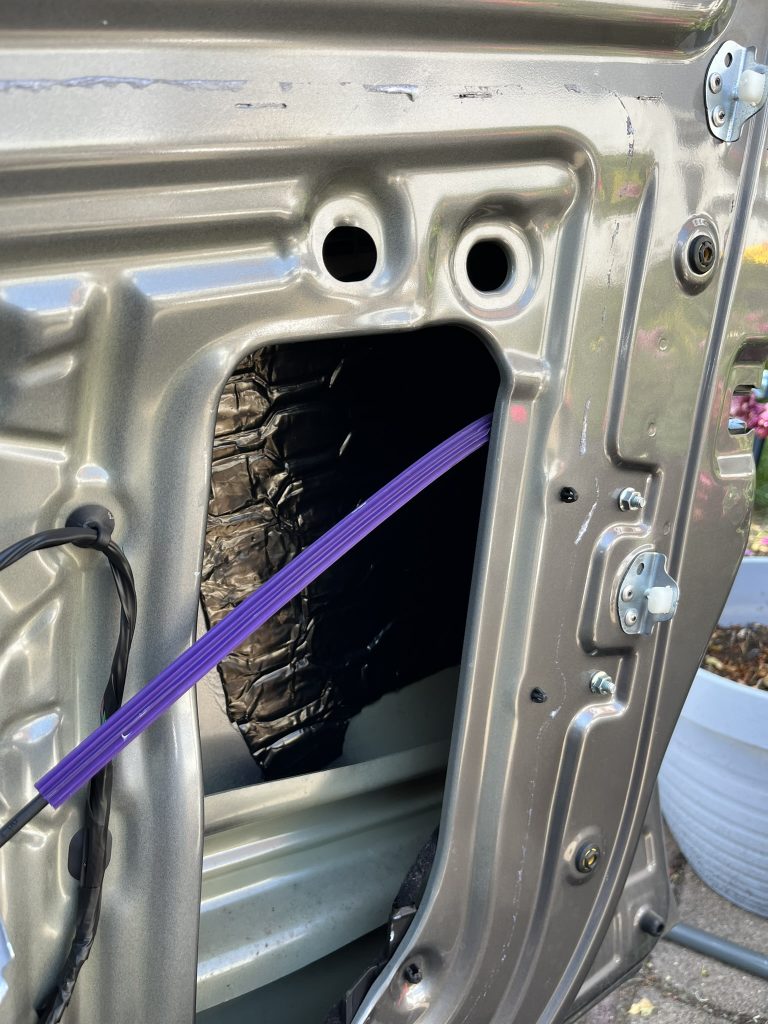
🔹 Insulate the outer panel (accessible through the openings)
- You can access the outer panel through the service holes.
- 2-3 large pieces of Alubutyl per door are sufficient
- Press down with a pressure roller or solid object.
Tip: Never tape over moving parts (window regulator!) ⚠️
🔹 Insulate inner panel
- Apply a generous amount of aluminum butyl around the speaker.
- Also insulate large sheet metal surfaces above and below.
🔊 Step 4: Installing new speakers
Now the new sound is being installed!
🧩 Attach the adapter rings
- Many aftermarket speakers require adapter rings made of plastic or MDF.
- These ensure a tight fit and prevent vibrations.
🔌 Wiring the loudspeaker
- Use adapter cables or crimp/solder new speaker cables.
- Observe polarity: usually + is the thicker or marked cable.
Optional: Crossover or capacitor:
- If present, e.g. in 2-way systems, connect correctly in between.
- Coaxial loudspeakers (with built-in tweeter) do not require a separate crossover.
🔩 Attaching the loudspeaker
- Tighten the screws well – but do not overtighten.
- If necessary, use a seal or foam rubber for decoupling.
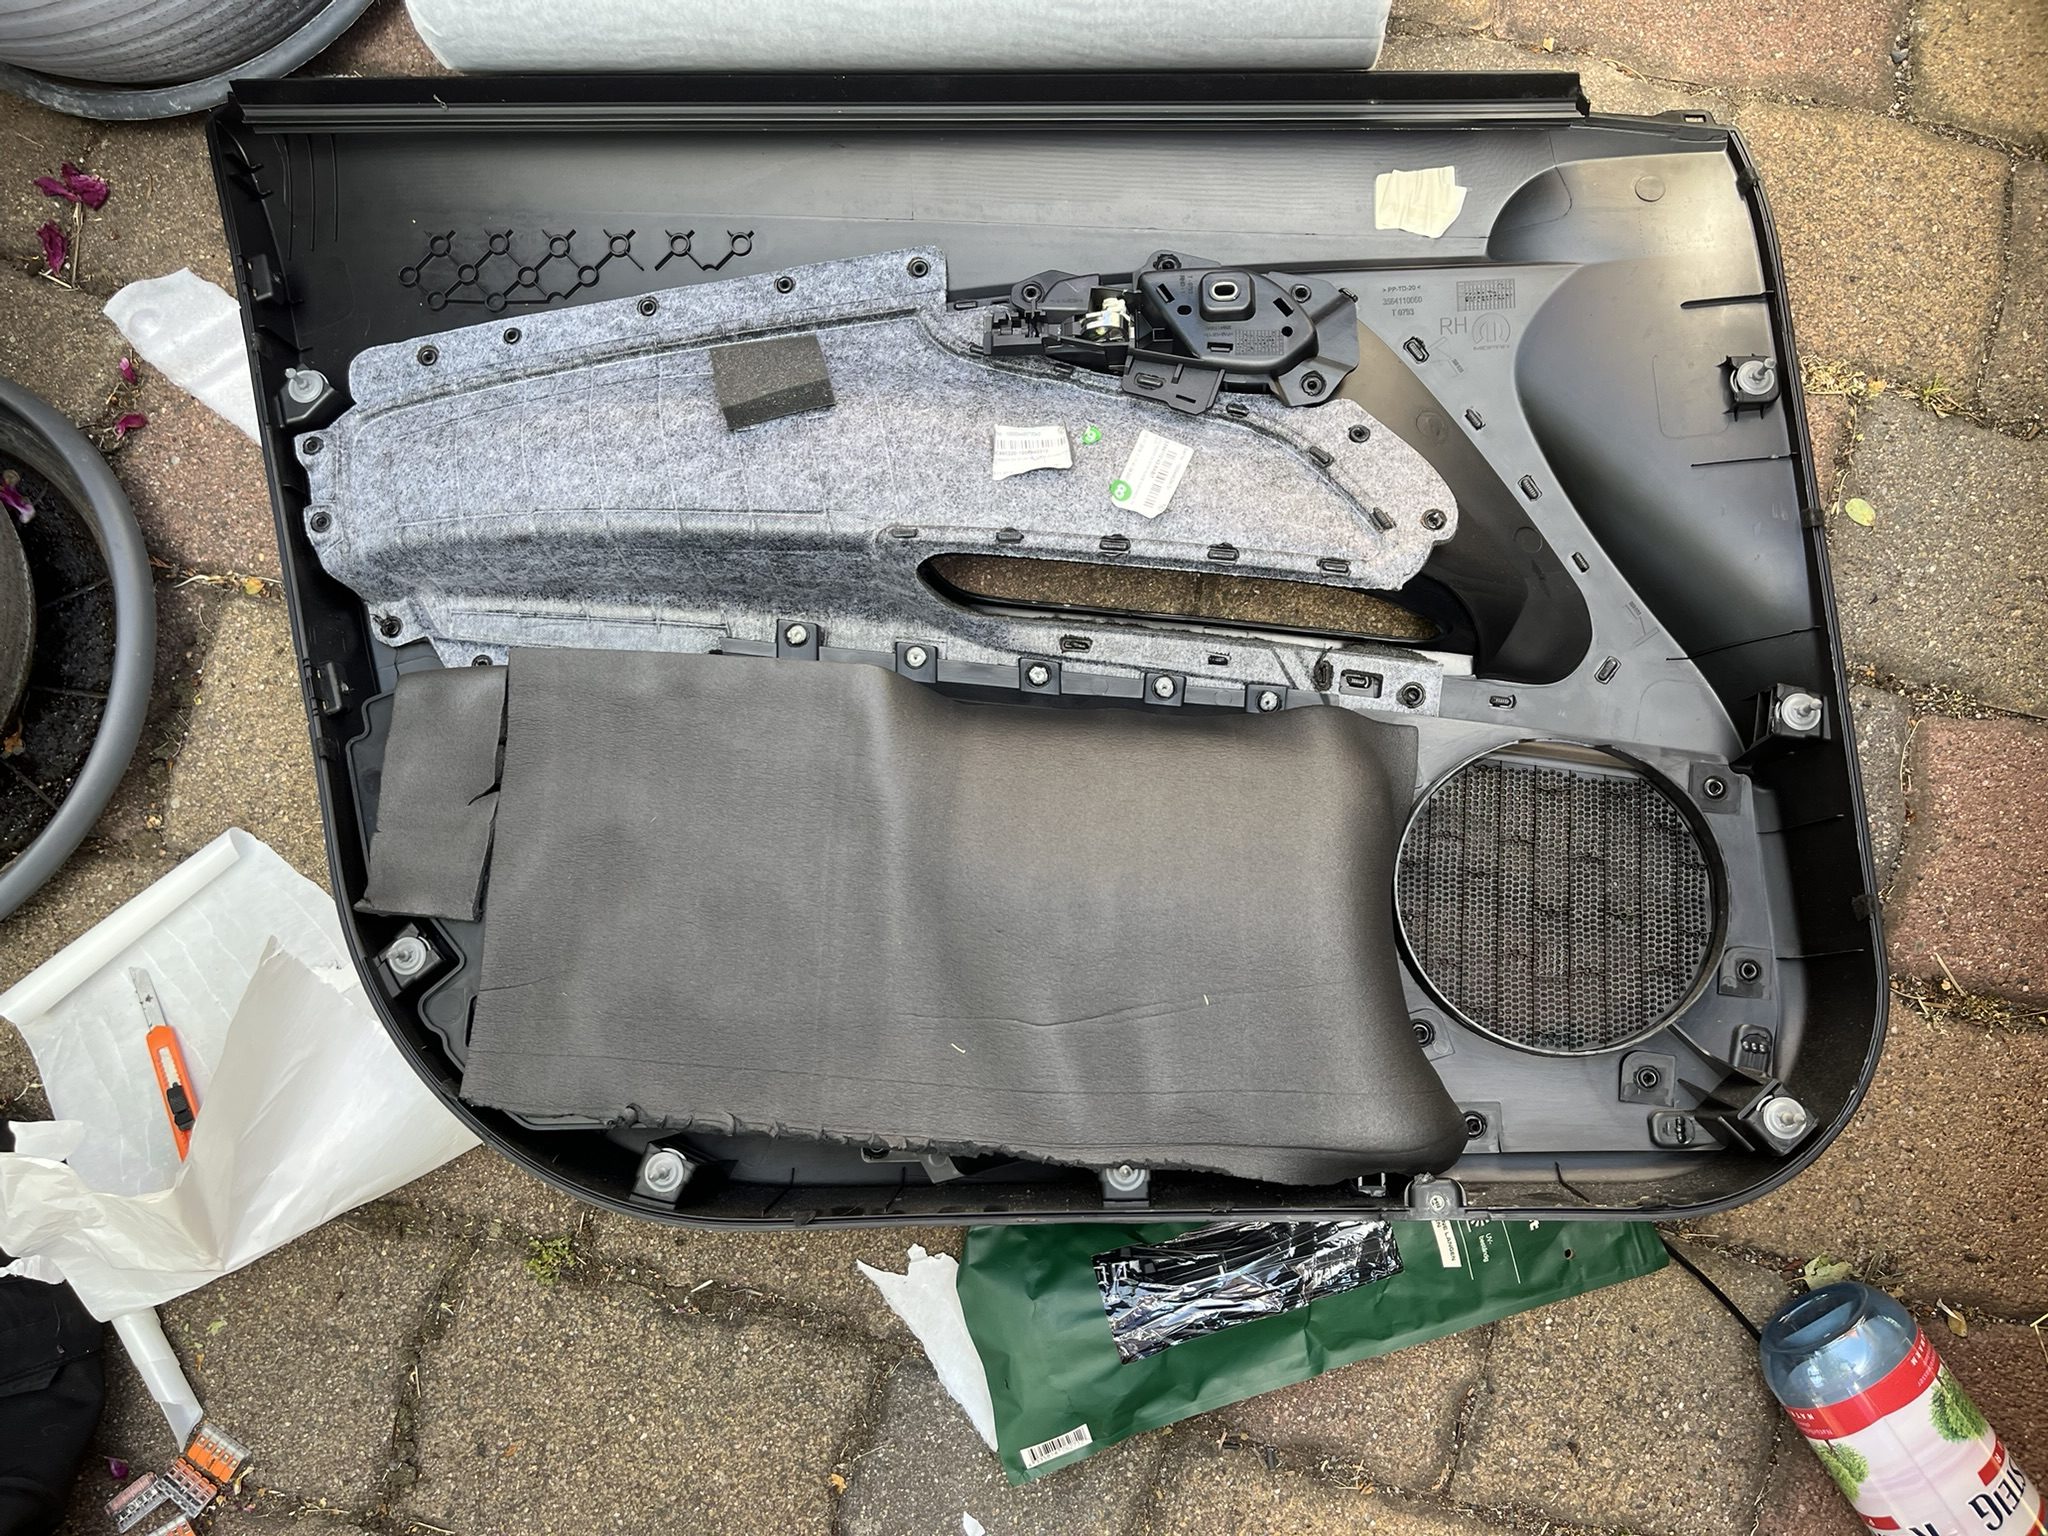
🧽 Step 5: Insulate the door trim – for the finishing touches
The door trim itself can also rattle or reflect sound.
🔇 Stick on foam or fleece
- On large plastic surfaces on the rear.
- Especially behind the speaker area.
- Pay attention to spacers, clips and screws – do not glue over them!
💨 Dampen reflection
Optional: Place foam pieces in the areas between the cladding and the inner panel (without pressure on the technology).
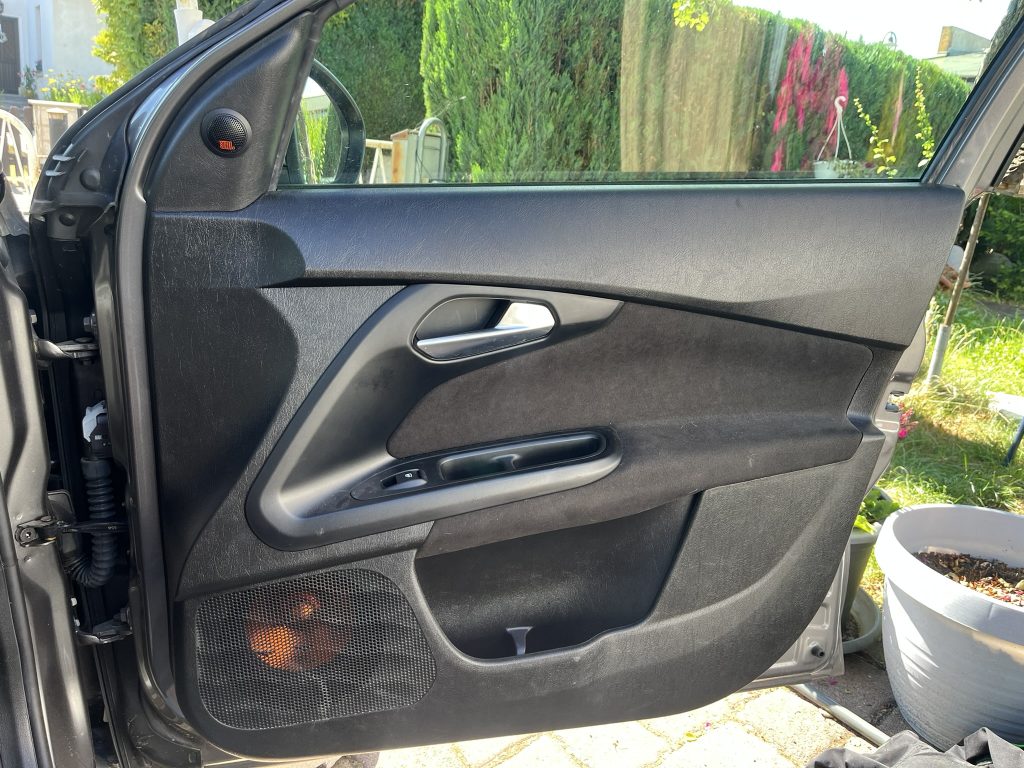
🔧 Step 6: Reassemble everything
Now comes the moment of truth!
- Reconnect the plug
- Clip on the panel cleanly
- All screws in place
🔁 Then test the door mechanics:
- Window regulator
- Door lock
- Sound sample: 🎵
🎶 Step 7: Enjoy the new sound!
Now it’s time – music on, world off!
Play your favorite songs and you’ll notice immediately:
- 🔊 Basses are richer
- 🔍 Details are more clearly audible
- 🔇 External noises are significantly quieter
Good insulation acts like an acoustic amplifier – even without an additional subwoofer.
📝 Conclusion
A loudspeaker installation with door insulation is one of the best DIY upgrades for your car. You don’t need any specialist knowledge – just a little time, patience and the right material.
✅ More sound
✅ Less vibration
✅ Better driving experience
🤝 Questions or feedback?
Do you still have questions about speaker installation or need help choosing the right insulation material? Then feel free to join my Discord server or use the contact form:
👉 Discord-Server
👉 Contact form
I look forward to helping you!🚀
📎 Further tips & tools
Then subscribe to our newsletter!
*Transparency notice: This post contains affiliate links. If you buy something through it, I will receive a small commission – at no extra cost to you. Thank you for your support!